Paso 11: Detección de colisiones
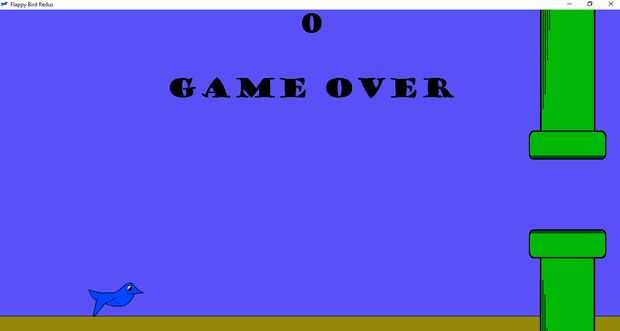

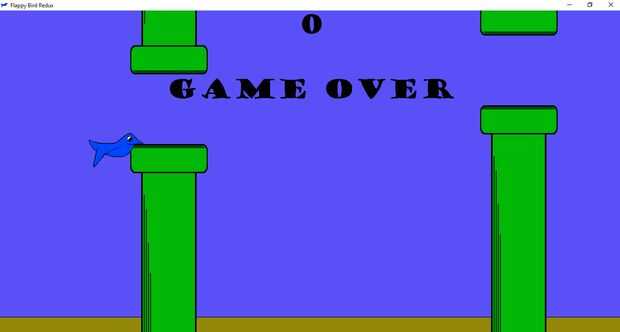
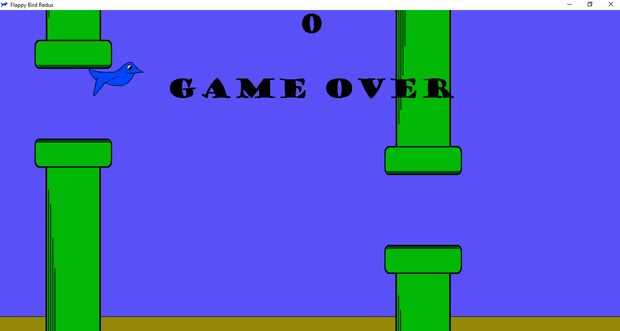
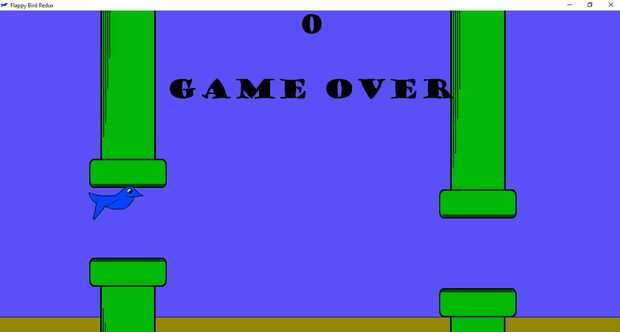
Este es el paso final. El juego actualmente tiene funcionalidad completa con movimiento de la tubería, movimiento del pájaro, etc.. Ahora vamos a escribir código que determina cuando el jugador ha perdido dentro de TopClass. Esto lo lograremos con una línea de código dentro del bucle de juego y dos métodos (collisionDetection y collisionHelper). A continuación ver un video de unas pruebas de colisión.
Ante todo, crear el esqueleto de las collisionDetection (para que eclipse no te enojes te), luego agregue "las collisionDetection (bp1, bp2, tp1, tp2, pájaro);" justo antes de que se llama al método updateScore en el circuito del juego.
Si lo piensas bien, hay cinco posibles colisiones que pueden ocurrir. El pájaro podría chocar con uno de los cuatro tubos o el suelo. Esto significa que puede crear un método auxiliar que se encarga de la lógica idéntica para los cuatro abordajes de tubo posible. Debido a esto, vamos a empezar con el método collisionHelper.
Lógicamente, se trata de cómo vamos a detectar una colisión (algo que he desarrollado, así que no estoy seguro de cuán eficiente es comparado con otros métodos de detección de colisiones):
Necesitamos las clases jugador y obstáculo para métodos que devuelven un objeto Rectangle y el objeto BufferedImage
* Usando los rectángulos, comprobamos si rectángulo el pájaro intersecta rectángulo de una pipa particular
* Si hay una intersección, obtener el rango de coordenadas que la intersección (x primera, final x, y primera, y final)
* Utilizando el pájaro y la pipa BufferedImages, prueba de cada píxel en el área de colisión para cada buffer; Si el píxel no es transparente (Recuerde que los gráficos se entrelazan) tanto para el pájaro como tubo, entonces ha ocurrido una colisión
Sabiendo esto, empezamos a trabajar en collisionHelper. Rectángulos son agradables porque usted puede probar si las intersecciones se han producido, así como seguimiento de posición en la pantalla de la zona de intersección.
Creamos un nuevo rectángulo que es la intersección entre el pájaro y la pipa. La variable firstI es la primera X pixel para iterar. es la diferencia entre el lado izquierdo del rectángulo de esquina y la coordenada de X de pájaro (r1) ahora a la izquierda. La variable firstJ es el primer píxel Y para repetir es la diferencia entre el lado superior del rectángulo de intersección y coordenadas de arriba Y de las aves. Estos dos se utilizan para referenciar el objeto Ave.
También necesitamos variables auxiliares para utilizar al hacer referencia al objeto de colisión. Las variables bp1XHelper y bp1YHelper utilizan lógica similar como firstI y firstJ, excepto que referencia los objetos pájaro y colisión.
Para nuestro análisis iterativo, creamos un bucle anidado en otro bucle, iteración de la firstI/J a la anchura y altura del objeto pájaro (r.getWidth() + firstI es igual a r1.getWidth()). Integrado en el bucle interior, tenemos una instrucción condicional que evalúa la transparencia del píxel. B1.getRGB (i, j) y 0xFF000000 simplemente agarra el valor alfa del píxel, y si no tiene el valor de 0 x 00, hay un píxel no transparente presente. Probamos para b1 y b2, y si ambos son opacas, ha habido una colisión.
Siempre se produce una colisión, enviamos "Juego encima" para PlayGameScreen para la pintura a través de la pantalla, acabar el bucle de juego cambiando loopVar a false, indicar que la partida ha terminado por cambiar de juego falso y romper con el lazo.
------
Ahora, dar contenido a las collisionDetection es bastante simple. Empezar por llamar a collisionHelper para el pájaro y cada uno de los objetos de tubo, pasando en su rectángulo relativo y buffer. A continuación, comprobar si se ha producido una colisión con el "suelo" por la prueba si la parte inferior del ave ha superado la posición de la tierra (SCREEN_HEIGHT * 7/8). Si es así, enviar "Juego sobre" terminar el bucle de juego e indicar la partida ha terminado.
import java.awt.Dimension; import java.awt.Font; import java.awt.Image; import java.awt.Color; import java.awt.LayoutManager; import java.awt.Rectangle; import java.awt.Toolkit; import java.awt.event.ActionEvent; import java.awt.event.ActionListener; import java.awt.event.KeyEvent; import java.awt.event.KeyListener; import java.awt.image.BufferedImage; import javax.swing.*; public class TopClass implements ActionListener, KeyListener { //global constant variables private static final int SCREEN_WIDTH = (int) Toolkit.getDefaultToolkit().getScreenSize().getWidth(); private static final int SCREEN_HEIGHT = (int) Toolkit.getDefaultToolkit().getScreenSize().getHeight(); private static final int PIPE_GAP = SCREEN_HEIGHT/5; //distance in pixels between pipes private static final int PIPE_WIDTH = SCREEN_WIDTH/8, PIPE_HEIGHT = 4*PIPE_WIDTH; private static final int BIRD_WIDTH = 120, BIRD_HEIGHT = 75; private static final int UPDATE_DIFFERENCE = 25; //time in ms between updates private static final int X_MOVEMENT_DIFFERENCE = 5; //distance the pipes move every update private static final int SCREEN_DELAY = 300; //needed because of long load times forcing pipes to pop up mid-screen private static final int BIRD_X_LOCATION = SCREEN_WIDTH/7; private static final int BIRD_JUMP_DIFF = 10, BIRD_FALL_DIFF = BIRD_JUMP_DIFF/2, BIRD_JUMP_HEIGHT = PIPE_GAP - BIRD_HEIGHT - BIRD_JUMP_DIFF*2; //global variables private boolean loopVar = true; //false -> don't run loop; true -> run loop for pipes private boolean gamePlay = false; //false -> game not being played private boolean birdThrust = false; //false -> key has not been pressed to move the bird vertically private boolean birdFired = false; //true -> button pressed before jump completes private boolean released = true; //space bar released; starts as true so first press registers private int birdYTracker = SCREEN_HEIGHT/2 - BIRD_HEIGHT; private Object buildComplete = new Object(); //global swing objects private JFrame f = new JFrame("Flappy Bird Redux"); private JButton startGame; private JPanel topPanel; //declared globally to accommodate the repaint operation and allow for removeAll(), etc. //other global objects private static TopClass tc = new TopClass(); private static PlayGameScreen pgs; //panel that has the moving background at the start of the game /** * Default constructor */ public TopClass() { } /** * Main executable method invoked when running .jar file * args */ public static void main(String[] args) { //build the GUI on a new thread javax.swing.SwingUtilities.invokeLater(new Runnable() { public void run() { tc.buildFrame(); //create a new thread to keep the GUI responsive while the game runs Thread t = new Thread() { public void run() { tc.gameScreen(true); } }; t.start(); } }); } /** * Method to construct the JFrame and add the program content */ private void buildFrame() { Image icon = Toolkit.getDefaultToolkit().getImage(this.getClass().getResource("resources/blue_bird.png")); f.setContentPane(createContentPane()); f.setResizable(true); f.setDefaultCloseOperation(JFrame.EXIT_ON_CLOSE); f.setAlwaysOnTop(false); f.setVisible(true); f.setMinimumSize(new Dimension(SCREEN_WIDTH*1/4, SCREEN_HEIGHT*1/4)); f.setExtendedState(JFrame.MAXIMIZED_BOTH); f.setIconImage(icon); f.addKeyListener(this); } private JPanel createContentPane() { topPanel = new JPanel(); //top-most JPanel in layout hierarchy topPanel.setBackground(Color.BLACK); //allow us to layer the panels LayoutManager overlay = new OverlayLayout(topPanel); topPanel.setLayout(overlay); //Start Game JButton startGame = new JButton("Start Playing!"); startGame.setBackground(Color.BLUE); startGame.setForeground(Color.WHITE); startGame.setFocusable(false); //rather than just setFocusabled(false) startGame.setFont(new Font("Calibri", Font.BOLD, 42)); startGame.setAlignmentX(0.5f); //center horizontally on-screen startGame.setAlignmentY(0.5f); //center vertically on-screen startGame.addActionListener(this); topPanel.add(startGame); //must add last to ensure button's visibility pgs = new PlayGameScreen(SCREEN_WIDTH, SCREEN_HEIGHT, true); //true --> we want pgs to be the splash screen topPanel.add(pgs); return topPanel; } /** * Implementation for action events */ public void actionPerformed(ActionEvent e) { if(e.getSource() == startGame) { //stop the splash screen loopVar = false; fadeOperation(); } else if(e.getSource() == buildComplete) { Thread t = new Thread() { public void run() { loopVar = true; gamePlay = true; tc.gameScreen(false); } }; t.start(); } } public void keyPressed(KeyEvent e) { if(e.getKeyCode() == KeyEvent.VK_SPACE && gamePlay == true && released == true){ //update a boolean that's tested in game loop to move the bird if(birdThrust) { //need this to register the button press and reset the birdYTracker before the jump operation completes birdFired = true; } birdThrust = true; released = false; } else if(e.getKeyCode() == KeyEvent.VK_B && gamePlay == false) { birdYTracker = SCREEN_HEIGHT/2 - BIRD_HEIGHT; //need to reset the bird's starting height birdThrust = false; //if user presses SPACE before collision and a collision occurs before reaching max height, you get residual jump, so this is preventative actionPerformed(new ActionEvent(startGame, -1, "")); } if(e.getKeyCode() == KeyEvent.VK_ESCAPE) { System.exit(0); } } public void keyReleased(KeyEvent e) { if(e.getKeyCode() == KeyEvent.VK_SPACE) { released = true; } } public void keyTyped(KeyEvent e) { } /** * Perform the fade operation that take place before the start of rounds */ private void fadeOperation() { Thread t = new Thread() { public void run() { topPanel.remove(startGame); topPanel.remove(pgs); topPanel.revalidate(); topPanel.repaint(); //panel to fade JPanel temp = new JPanel(); int alpha = 0; //alpha channel variable temp.setBackground(new Color(0, 0, 0, alpha)); //transparent, black JPanel topPanel.add(temp); topPanel.add(pgs); topPanel.revalidate(); topPanel.repaint(); long currentTime = System.currentTimeMillis(); while(temp.getBackground().getAlpha() != 255) { if((System.currentTimeMillis() - currentTime) > UPDATE_DIFFERENCE/2) { if(alpha < 255 - 10) { alpha += 10; } else { alpha = 255; } temp.setBackground(new Color(0, 0, 0, alpha)); topPanel.revalidate(); topPanel.repaint(); currentTime = System.currentTimeMillis(); } } topPanel.removeAll(); topPanel.add(temp); pgs = new PlayGameScreen(SCREEN_WIDTH, SCREEN_HEIGHT, false); pgs.sendText(""); //remove title text topPanel.add(pgs); while(temp.getBackground().getAlpha() != 0) { if((System.currentTimeMillis() - currentTime) > UPDATE_DIFFERENCE/2) { if(alpha > 10) { alpha -= 10; } else { alpha = 0; } temp.setBackground(new Color(0, 0, 0, alpha)); topPanel.revalidate(); topPanel.repaint(); currentTime = System.currentTimeMillis(); } } actionPerformed(new ActionEvent(buildComplete, -1, "Build Finished")); } }; t.start(); } /** * Method that performs the splash screen graphics movements */ private void gameScreen(boolean isSplash) { BottomPipe bp1 = new BottomPipe(PIPE_WIDTH, PIPE_HEIGHT); BottomPipe bp2 = new BottomPipe(PIPE_WIDTH, PIPE_HEIGHT); TopPipe tp1 = new TopPipe(PIPE_WIDTH, PIPE_HEIGHT); TopPipe tp2 = new TopPipe(PIPE_WIDTH, PIPE_HEIGHT); Bird bird = new Bird(BIRD_WIDTH, BIRD_HEIGHT); //variables to track x and y image locations for the bottom pipe int xLoc1 = SCREEN_WIDTH+SCREEN_DELAY, xLoc2 = (int) ((double) 3.0/2.0*SCREEN_WIDTH+PIPE_WIDTH/2.0)+SCREEN_DELAY; int yLoc1 = bottomPipeLoc(), yLoc2 = bottomPipeLoc(); int birdX = BIRD_X_LOCATION, birdY = birdYTracker; //variable to hold the loop start time long startTime = System.currentTimeMillis(); while(loopVar) { if((System.currentTimeMillis() - startTime) > UPDATE_DIFFERENCE) { //check if a set of pipes has left the screen //if so, reset the pipe's X location and assign a new Y location if(xLoc1 < (0-PIPE_WIDTH)) { xLoc1 = SCREEN_WIDTH; yLoc1 = bottomPipeLoc(); } else if(xLoc2 < (0-PIPE_WIDTH)) { xLoc2 = SCREEN_WIDTH; yLoc2 = bottomPipeLoc(); } //decrement the pipe locations by the predetermined amount xLoc1 -= X_MOVEMENT_DIFFERENCE; xLoc2 -= X_MOVEMENT_DIFFERENCE; if(birdFired && !isSplash) { birdYTracker = birdY; birdFired = false; } if(birdThrust && !isSplash) { //move bird vertically if(birdYTracker - birdY - BIRD_JUMP_DIFF < BIRD_JUMP_HEIGHT) { if(birdY - BIRD_JUMP_DIFF > 0) { birdY -= BIRD_JUMP_DIFF; //coordinates different } else { birdY = 0; birdYTracker = birdY; birdThrust = false; } } else { birdYTracker = birdY; birdThrust = false; } } else if(!isSplash) { birdY += BIRD_FALL_DIFF; birdYTracker = birdY; } //update the BottomPipe and TopPipe locations bp1.setX(xLoc1); bp1.setY(yLoc1); bp2.setX(xLoc2); bp2.setY(yLoc2); tp1.setX(xLoc1); tp1.setY(yLoc1-PIPE_GAP-PIPE_HEIGHT); //ensure tp1 placed in proper location tp2.setX(xLoc2); tp2.setY(yLoc2-PIPE_GAP-PIPE_HEIGHT); //ensure tp2 placed in proper location if(!isSplash) { bird.setX(birdX); bird.setY(birdY); pgs.setBird(bird); } //set the BottomPipe and TopPipe local variables in PlayGameScreen by parsing the local variables pgs.setBottomPipe(bp1, bp2); pgs.setTopPipe(tp1, tp2); if(!isSplash && bird.getWidth() != -1) { //need the second part because if bird not on-screen, cannot get image width and have cascading error in collision collisionDetection(bp1, bp2, tp1, tp2, bird); updateScore(bp1, bp2, bird); } //update pgs's JPanel topPanel.revalidate(); topPanel.repaint(); //update the time-tracking variable after all operations completed startTime = System.currentTimeMillis(); } } } /** * Calculates a random int for the bottom pipe's placement * int */ private int bottomPipeLoc() { int temp = 0; //iterate until temp is a value that allows both pipes to be onscreen while(temp <= PIPE_GAP+50 || temp >= SCREEN_HEIGHT-PIPE_GAP) { temp = (int) ((double) Math.random()*((double)SCREEN_HEIGHT)); } return temp; } /** * Method that checks whether the score needs to be updated * bp1 First BottomPipe object * bp2 Second BottomPipe object * bird Bird object */ private void updateScore(BottomPipe bp1, BottomPipe bp2, Bird bird) { if(bp1.getX() + PIPE_WIDTH < bird.getX() && bp1.getX() + PIPE_WIDTH > bird.getX() - X_MOVEMENT_DIFFERENCE) { pgs.incrementJump(); } else if(bp2.getX() + PIPE_WIDTH < bird.getX() && bp2.getX() + PIPE_WIDTH > bird.getX() - X_MOVEMENT_DIFFERENCE) { pgs.incrementJump(); } } /** * Method to test whether a collision has occurred * bp1 First BottomPipe object * bp2 Second BottomPipe object * tp1 First TopPipe object * tp2 Second TopPipe object * bird Bird object */ private void collisionDetection(BottomPipe bp1, BottomPipe bp2, TopPipe tp1, TopPipe tp2, Bird bird) { collisionHelper(bird.getRectangle(), bp1.getRectangle(), bird.getBI(), bp1.getBI()); collisionHelper(bird.getRectangle(), bp2.getRectangle(), bird.getBI(), bp2.getBI()); collisionHelper(bird.getRectangle(), tp1.getRectangle(), bird.getBI(), tp1.getBI()); collisionHelper(bird.getRectangle(), tp2.getRectangle(), bird.getBI(), tp2.getBI()); if(bird.getY() + BIRD_HEIGHT > SCREEN_HEIGHT*7/8) { //ground detection pgs.sendText("Game Over"); loopVar = false; gamePlay = false; //game has ended } } /** * Helper method to test the Bird object's potential collision with a pipe object. * r1 The Bird's rectangle component * r2 Collision component rectangle * b1 The Bird's BufferedImage component * b2 Collision component BufferedImage */ private void collisionHelper(Rectangle r1, Rectangle r2, BufferedImage b1, BufferedImage b2) { if(r1.intersects(r2)) { Rectangle r = r1.intersection(r2); int firstI = (int) (r.getMinX() - r1.getMinX()); //firstI is the first x-pixel to iterate from int firstJ = (int) (r.getMinY() - r1.getMinY()); //firstJ is the first y-pixel to iterate from int bp1XHelper = (int) (r1.getMinX() - r2.getMinX()); //helper variables to use when referring to collision object int bp1YHelper = (int) (r1.getMinY() - r2.getMinY()); for(int i = firstI; i < r.getWidth() + firstI; i++) { // for(int j = firstJ; j < r.getHeight() + firstJ; j++) { if((b1.getRGB(i, j) & 0xFF000000) != 0x00 && (b2.getRGB(i + bp1XHelper, j + bp1YHelper) & 0xFF000000) != 0x00) { pgs.sendText("Game Over"); loopVar = false; //stop the game loop gamePlay = false; //game has ended break; } } } } } }
.")
")
")


![Programación Tutorial [Scratch] - Cookie Clicker -](https://foto.askix.com/thumb/170x110/f/8a/f8a37c4a5fe2ef5bf8807f66eadb2280.jpg "Programación Tutorial [Scratch] - Cookie Clicker -")
")


![Cómo jugar Java [ME] Juegos en una PSP!](https://foto.askix.com/thumb/170x110/d/a0/da008d8c9ec91bb7c1a262baeb035814.jpg "Cómo jugar Java [ME] Juegos en una PSP!")

