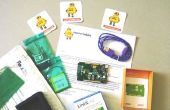
Paso 3: Programar el Arduino
Programar el Arduino con este hermoso código que he escrito para este proyecto. Sé que es un lío pero funciona muy bien y yo no soy un programador.
// Hardware Setup<br>#include #include "U8glib.h" #include #include #include #include #include #include U8GLIB_SSD1306_128X64 u8g(U8G_I2C_OPT_NO_ACK); // Display which does not send ACK dht DHT; RTC_DS3231 RTC; #define DHT22_PIN 11 #define SQW_FREQ DS3231_SQW_FREQ_1
// Output pins const int ledPin = 13; // pin that the LED is attached to const int L1 = 7; // pins for wakeup lights const int L2 = 9; const int L3 = 10; const int L4 = 6; const int L5 = 8; const int L6 = 3; const int L7 = 2; const int L8 = 4;
// Arduino Master setup void setup(void) { pinMode(ledPin, OUTPUT); pinMode(L1, OUTPUT); pinMode(L2, OUTPUT); pinMode(L3, OUTPUT); pinMode(L4, OUTPUT); pinMode(L5, OUTPUT); pinMode(L6, OUTPUT); pinMode(L7, OUTPUT); pinMode(L8, OUTPUT); Wire.begin(); RTC.begin(); // set font for the console window u8g.setFont(u8g_font_7x14);
// set upper left position for the string draw procedure u8g.setFontPosTop();
clear_screen(); // clear screen
Serial.begin(9600);
//------------------------------ // The main loop runs once every 15 seconds. To adjust the timing, there is a parameter called loopdelay. // This device is around 14.5 seconds and is finetuned everyday according to the real time clock. // (see timeatend parameter at the end of the code) if (EEPROM.read(255) == 0) EEPROM.write(255,200); } int short loopdelay = EEPROM.read(255)+14600; //------------------------------
DateTime now;
// System Variables (Do Not Touch) short Cbuffer[4]; double Clastmin; short Cclose[12]; short Cinst; short Ccloseavg; short Vtemp[120]; boolean warmup = true; short ntime = 9999; short nstart; short timeatend; short nsunrise = 7*60*4; double sun; short nwakeup; double time_offset; double eps; double eqtime; double decl; double ha; short dotweek;
// User Variables (OK to touch) double Longitude = 3; double Latitude = 51; double timezone = 1; //0 when DST in Belgium, 1 when normal short demopause = 200; short nwakeupstart = (6*60+45)*4;
// XY Graph Position and Size const byte originX = 2; const byte originY = 45;
const byte Hpoints = 124; const byte Vpoints = 45;
//Graphics parameters uint8_t line_pos = 0; #define ROW_MAX 4 #define LINE_MAX 17 #define x_MAX 127 #define y_MAX 63 uint8_t screen[ROW_MAX][LINE_MAX]; uint8_t rows, cols; #define LINE_PIXEL_HEIGHT 14 #define pi 3.141592653589793
// Function Clear Screen void clear_screen(void) { uint8_t i, j; for( i = 0; i < ROW_MAX; i++ ) for( j = 0; j < LINE_MAX; j++ ) screen[i][j] = 0; } // Draw Routine for the LCD Screen void draw(void) { // Axii u8g.drawHLine(originX, originY, Hpoints+1); u8g.drawVLine(originX, originY-Vpoints-1, Vpoints+1); // Y arrow u8g.drawVLine(originX-1, originY-Vpoints+1, 2); u8g.drawVLine(originX+1, originY-Vpoints+1, 2); u8g.drawPixel(originX-2, originY-Vpoints+2); u8g.drawPixel(originX+2, originY-Vpoints+2);
// X arrow u8g.drawHLine(originX+Hpoints-2, originY-1, 2); u8g.drawHLine(originX+Hpoints-2, originY+1, 2); u8g.drawPixel(originX+Hpoints-2,originY-2); u8g.drawPixel(originX+Hpoints-2,originY+2);
// Vertical Grid Points for(int i = 20; i <= Hpoints-4; i+=20 ) { for(int j = 3; j <= Vpoints-2; j+=3 ) { u8g.drawPixel(originX+i,originY-j); } } // Horizontal Grid Points for(int j = 9; j <= Vpoints-4; j+=15 ) { for(int i = 4; i <= Hpoints-4; i+=4 ) { u8g.drawPixel(originX+i,originY-j); } } // The trace of the temperature over time for (int i=0; i<120; i++) { Vtemp[(i + 100) % 120] = (EEPROM.read(i)-20)*15/50; //trick by giving Vtemp another times value, thus shifting the graph if (Vtemp[i] > 0 && Vtemp[i] <= Vpoints) { u8g.drawPixel(originX+i,originY-Vtemp[i]); } } // Print current time
if (ntime/240 < 10) { u8g.setPrintPos(originX, 63-LINE_PIXEL_HEIGHT); u8g.print(0); u8g.setPrintPos(originX+7, 63-LINE_PIXEL_HEIGHT); u8g.print(ntime/240); } else { u8g.setPrintPos(originX, 63-LINE_PIXEL_HEIGHT); u8g.print(ntime/240); } u8g.setPrintPos(originX+14, 63-LINE_PIXEL_HEIGHT); u8g.print(":"); if ((ntime % 240)/4 < 10) { u8g.setPrintPos(originX+21, 63-LINE_PIXEL_HEIGHT); u8g.print(0); u8g.setPrintPos(originX+28, 63-LINE_PIXEL_HEIGHT); u8g.print((ntime % 240)/4); } else { u8g.setPrintPos(originX+21, 63-LINE_PIXEL_HEIGHT); u8g.print((ntime % 240)/4); } // Print daylight time u8g.setPrintPos(originX+44, 63-LINE_PIXEL_HEIGHT); u8g.print("*"); //Print hour u8g.setPrintPos(originX+51, 63-LINE_PIXEL_HEIGHT); u8g.print(nsunrise/240); //Print the : u8g.setPrintPos(originX+58, 63-LINE_PIXEL_HEIGHT); u8g.print(":"); if ((nsunrise % 240)/4 < 10) { u8g.setPrintPos(originX+65, 63-LINE_PIXEL_HEIGHT); u8g.print(0); u8g.setPrintPos(originX+72, 63-LINE_PIXEL_HEIGHT); u8g.print((nsunrise % 240)/4); } else { u8g.setPrintPos(originX+65, 63-LINE_PIXEL_HEIGHT); u8g.print((nsunrise % 240)/4); } //Print the temperature for last minute u8g.setPrintPos(originX+87, 63-LINE_PIXEL_HEIGHT); u8g.print((Clastmin+100)/10, 1); u8g.setPrintPos(originX+116, 63-LINE_PIXEL_HEIGHT); u8g.print("\xb0"); // Time cursor at top int plottime = ntime + 24 + 5760; int cursorpos = (((plottime)*120/5760) + 100) % 120; u8g.drawPixel(originX+cursorpos,1); u8g.drawHLine(originX+cursorpos-1,0,3);
}
// Arduino Main Loop (runs once every 15 seconds) void loop(void) { //Processing starts, light LED digitalWrite(ledPin,HIGH); // get the time from RTC clock now = RTC.now();
//Device has just been powered on: if (ntime == 9999) { //Set relays digitalWrite(L8,HIGH); digitalWrite(L7,HIGH); digitalWrite(L6,HIGH); digitalWrite(L5,HIGH); digitalWrite(L4,HIGH); digitalWrite(L3,HIGH); digitalWrite(L2,HIGH); digitalWrite(L1,HIGH); delay(demopause); digitalWrite(L1,LOW); delay(demopause); digitalWrite(L2,LOW); delay(demopause); digitalWrite(L3,LOW); delay(demopause); digitalWrite(L4,LOW); delay(demopause); digitalWrite(L5,LOW); delay(demopause); digitalWrite(L6,LOW); delay(demopause); digitalWrite(L7,LOW); delay(demopause); digitalWrite(L8,LOW); delay(demopause*5); digitalWrite(L8,HIGH); delay(demopause); digitalWrite(L7,HIGH); delay(demopause); digitalWrite(L6,HIGH); delay(demopause); digitalWrite(L5,HIGH); delay(demopause); digitalWrite(L4,HIGH); delay(demopause); digitalWrite(L3,HIGH); delay(demopause); digitalWrite(L2,HIGH); delay(demopause); digitalWrite(L1,HIGH);
// Calculate Sunrise, once a day and on startup if (ntime == 1320 || ntime == 9999) { // calculate sunrise and day of the week here eps=2*pi/365*(((now.month()-1)*30.3 + now.day() + 0.5)-1); eqtime=229.18*(0.000075+0.001868*cos(eps)-0.032077*sin(eps)-0.014615*cos(2*eps)-0.040849*sin(2*eps)); decl=0.006918-0.399912*cos(eps)+0.070257*sin(eps)-0.006758*cos(2*eps)+0.000907*sin(2*eps)-0.002697*cos(3*eps)+0.00148*sin(3*eps);
time_offset=eqtime-4*Longitude+60*timezone; ha = acos((cos(90.833/180*pi)/(cos(Latitude/180*pi)*cos(decl)))-tan(Latitude/180*pi)*tan(decl)); nsunrise = (720 + 4*(Longitude-ha/pi*180) - eqtime) * 4;
dotweek = now.dayOfWeek(); dotweek = now.dayOfWeek(); }
// Calculate time to sunrise sun = (((ntime-nsunrise)) % (24*60*4))/4; if (sun > 60) sun = sun - 24*60;
Establezca el parámetro ntime para corregir tiempo ntime=now.hour()*60*4+now.minute()*4+((now.second()+8) / 15); NStarter = ntime; // Set the ntime parameter to correct time ntime=now.hour()*60*4+now.minute()*4+((now.second()+8) / 15); nstart=ntime; }
Dispositivo ya está en ejecución: else {si (ntime > (NStarter + 12 * 4) || NStarter > 5710) calentamiento = false; // Device is already running: else { if (ntime > (nstart + 12*4) || nstart > 5710) warmup = false; } //Device is already running or just powered on, doesn't matter: //Read temp probe uint32_t start = micros(); int chk = DHT.read22(DHT22_PIN); uint32_t stop = micros(); switch (chk)
Imprimir entradas de sonda Temp puerto serie {caso DHTLIB_OK: Serial.print ("OK,"); rotura; caso DHTLIB_ERROR_CHECKSUM: Serial.print ("Checksum error"); rotura; caso DHTLIB_ERROR_TIMEOUT: Serial.print ("tiempo de espera error,"); rotura; por defecto: Serial.print ("error desconocido,"); rotura; //Print inputs from Temp probe to serial port { case DHTLIB_OK: Serial.print("OK, "); break; case DHTLIB_ERROR_CHECKSUM: Serial.print("Checksum error, "); break; case DHTLIB_ERROR_TIMEOUT: Serial.print("Time out error, "); break; default: Serial.print("Unknown error, "); break; } //Print some extra debug data to serial port
Serial.print(now.day()); Serial.print('-'); Serial.print(now.month()); Serial.print('-'); Serial.print(now.year()); Serial.print(" "); Serial.print(now.hour()); Serial.print(':'); Serial.print(now.minute()); Serial.print(" "); Serial.print(ntime); Serial.print('/'); Serial.print(loopdelay); Serial.print('/'); Serial.print(nsunrise/60/4); Serial.print(':'); Serial.print((nsunrise%(60*4))/4); Serial.print(" "); Cinst = DHT.temperature * 10 - 100; // Cinst = random(50,100); //for test Serial.print((Cinst+100)); Serial.print(" => "); Cbuffer[ntime % 4] = Cinst; Clastmin = (Cbuffer[0] + Cbuffer[1] + Cbuffer[2] + Cbuffer[3])/4; Serial.print((Clastmin+100)/10,1); Si (ntime % 4 == 0) {Serial.print(",\t"); CCierre [(ntime % 48) / 4] = Clastmin; if (ntime % 4 == 0) { Serial.print(",\t"); Cclose[(ntime % 48) / 4] = Clastmin; } if (ntime % 48 == 24) { Ccloseavg = (Cclose[0] + Cclose[1] + Cclose[2] + Cclose[3] + Cclose[4] + Cclose[5] + Cclose[6] + Cclose[7] + Cclose[8] + Cclose[9] + Cclose[10] + Cclose[11])/12; if (warmup == true) EEPROM.write(ntime/48,0); else EEPROM.write(ntime/48,Ccloseavg); Serial.print(",\t"); Serial.print((EEPROM.read(ntime/48)+100)); }
// Wakeuplight! nwakeup = (((ntime-nwakeupstart)) % (24*60*4))/4;
crear el if funciones que encienda la luz consecutivamente, si aquí (nwakeup < 40 & & (nsunrise > nwakeupstart - 30 * 4)) {si (nwakeup > 0) digitalWrite(L1,LOW); si digitalWrite(L2,LOW) (nwakeup > 5); si (nwakeup > 10 & & dotweek! = 6 & & dotweek! = 0) digitalWrite(L3,LOW); si (nwakeup > 14 & & dotweek! = 6 & & dotweek! = 0) digitalWrite (L4 BAJA); Si (nwakeup > 18 & & dotweek! = 6 & & dotweek! = 0) digitalWrite(L5,LOW); Si (nwakeup > 22 & & dotweek! = 6 & & dotweek! = 0) digitalWrite(L6,LOW); Si (nwakeup > 25 & & dotweek! = 6 & & dotweek! = 0) digitalWrite(L7,LOW); Si (nwakeup > 28 & & dotweek! = 6 & & dotweek! = 0) digitalWrite(L8,LOW); //create the if functions that turn the light on consecutively, here if (nwakeup < 40 && (nsunrise > nwakeupstart - 30*4)) { if (nwakeup > 0) digitalWrite(L1,LOW); if (nwakeup > 5) digitalWrite(L2,LOW); if (nwakeup > 10 && dotweek != 6 && dotweek != 0) digitalWrite(L3,LOW); if (nwakeup > 14 && dotweek != 6 && dotweek != 0) digitalWrite(L4,LOW); if (nwakeup > 18 && dotweek != 6 && dotweek != 0) digitalWrite(L5,LOW); if (nwakeup > 22 && dotweek != 6 && dotweek != 0) digitalWrite(L6,LOW); if (nwakeup > 25 && dotweek != 6 && dotweek != 0) digitalWrite(L7,LOW); if (nwakeup > 28 && dotweek != 6 && dotweek != 0) digitalWrite(L8,LOW); } else { digitalWrite(L1,HIGH); digitalWrite(L2,HIGH); digitalWrite(L3,HIGH); digitalWrite(L4,HIGH); digitalWrite(L5,HIGH); digitalWrite(L6,HIGH); digitalWrite(L7,HIGH); digitalWrite(L8,HIGH); } Else {digitalWrite(L1,HIGH); digitalWrite(L2,HIGH); digitalWrite(L3,HIGH); digitalWrite(L4,HIGH); digitalWrite(L5,HIGH); digitalWrite(L6,HIGH); digitalWrite(L7,HIGH); digitalWrite(L8,HIGH); // Picture loop - to draw the stuff on the screen (done once every loop) u8g.firstPage(); do { draw(); } while( u8g.nextPage() ); // End Picture Loop Lazo de la foto - para dibujar las cosas en la pantalla (una vez cada bucle hecho) u8g.firstPage(); {draw(); //Processing ended, shut down LED Serial.println(); digitalWrite(ledPin,LOW); //At the end of day, adjust the loopdelay parameter to make sure each loop takes 15 seconds ntime++; if (ntime == 5760) { timeatend=now.minute()*60+now.second(); //include DST effect if (timeatend > 60*60) { loopdelay = loopdelay - (60*60-timeatend)/5760*1000; } else { loopdelay = loopdelay + timeatend/5760*1000; } EEPROM.write(255,loopdelay-14600); ntime=0; } delay(loopdelay); } Al final del día, ajustar el parámetro loopdelay para asegurarse de que cada bucle tarda 15 segundos ntime ++; Si (ntime == 5760) {timeatend=now.minute()*60+now.second(); //include DST efecto si (timeatend > 60 * 60) {loopdelay = loopdelay - (60 * 60-timeatend) / 5760 * 1000;Else {loopdelay = loopdelay + timeatend/5760 * 1000;EEPROM.write(255,loopdelay-14600); nTime = 0;Delay(loopdelay);
