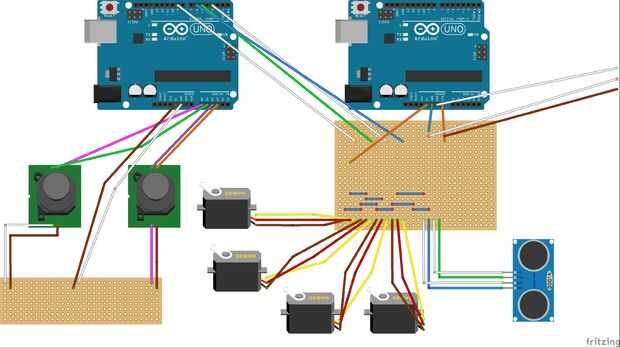
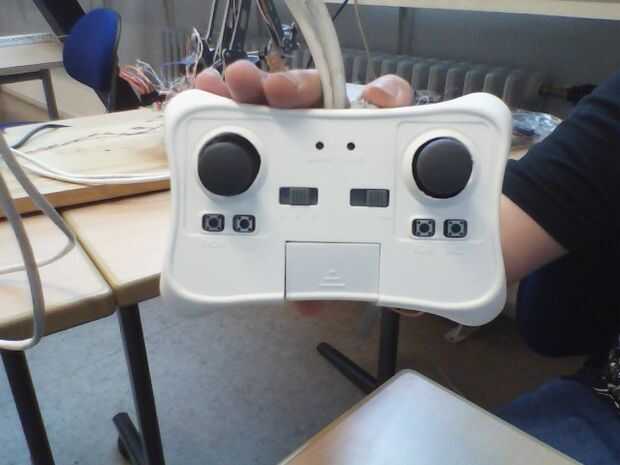
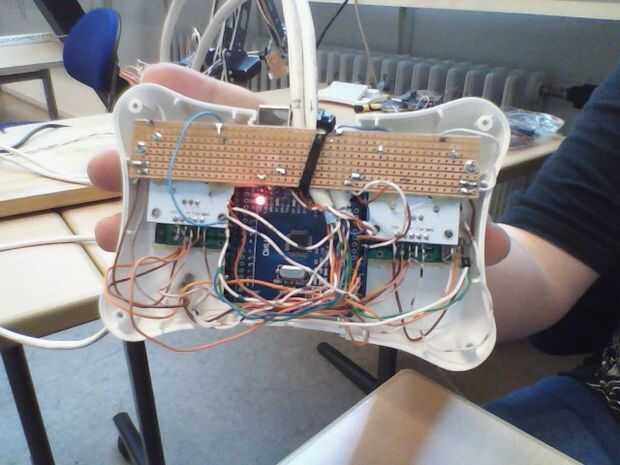
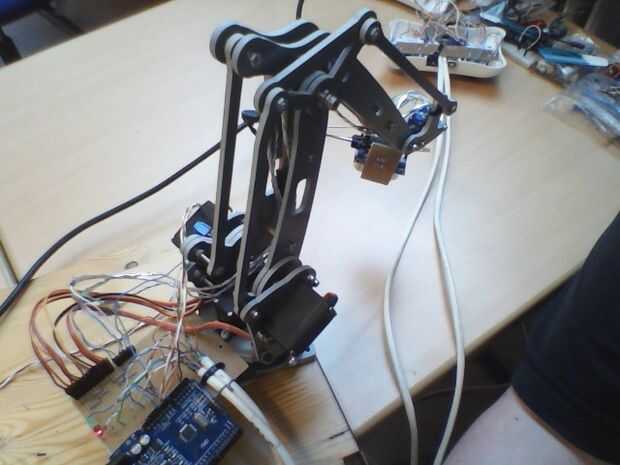
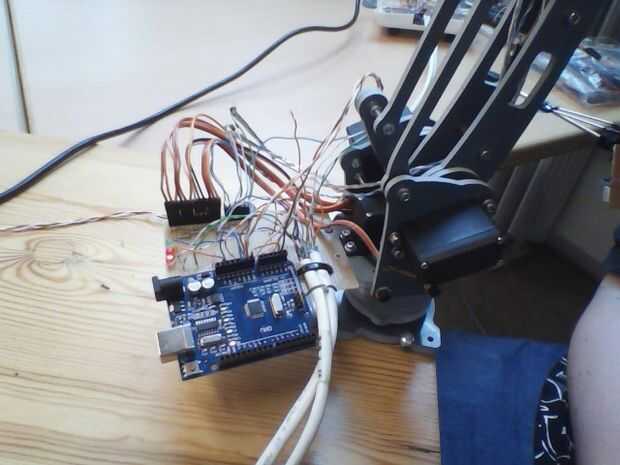
Paso 1: Opbygning og koden
![]()
![]()
![]()
![]()
![]()
/*Controlling a servo position using a potentiometer (variable resistor) by Michal Rinott modified on 8 Nov 2013 by Scott Fitzgerald http://www.arduino.cc/en/Tutorial/Knob</a> */
#include <SoftwareSerial.H>
// you can choose any digital pins for trigger and echo const int trigger = 12; const int echo = 13;
int distance; long duration; #include <servo.h> Servo myservo; // create servo object to control a servo Servo myservo1; // create servo object to control a servo Servo myservo2; // create servo object to control a servo Servo myservo3; // create servo object to control a servo int potpin = 0; // analog pin used to connect the potentiometer int val; // variable to read the value from the analog pin int valop=90; int potpin1 = 1; // analog pin used to connect the potentiometer int val1; // variable to read the value from the analog pin int valop1=90; int potpin2 = 2; // analog pin used to connect the potentiometer int val2; // variable to read the value from the analog pin int valop2=90; int potpin3 = 3; // analog pin used to connect the potentiometer int val3; // variable to read the value from the analog pin int valop3=90; #define trigPin 13 #define echoPin 12 #define led 10 #define led2 11 void setup() { pinMode (trigger, OUTPUT); pinMode (echo, INPUT); Serial.begin(9600); myservo.attach(9); // attaches the servo on pin 9 to the servo object myservo1.attach(3); // attaches the servo on pin 3 to the servo object myservo2.attach(5); // attaches the servo on pin 5 to the servo object myservo3.attach(6); // attaches the servo on pin 6 to the servo object pinMode(trigPin, OUTPUT); pinMode(echoPin, INPUT); pinMode(led, OUTPUT); pinMode(led2, OUTPUT); Serial.begin(9600); } void loop() { val = analogRead(potpin); // reads the value of the potentiometer (value between 0 and 1023) // val = map(val, 0, 1023, 0, 1023); //Serial.print("valop_"); //Serial.println(valop); // waits for the servo to get there if (val<600&&val>300){ myservo.write (valop=valop); delay(10); //Serial.print("val_"); //Serial.println(val);</servo.h> //At the beginning, the trigger must be set low digitalWrite(trigger, LOW); delayMicroseconds (2);
digitalWrite(trigger, HIGH); delayMicroseconds (10); digitalWrite(trigger, LOW);
//pulseIn function reads if a pin is either high or low //echo pin outputs the time it took the wave to hit the object and comeback in microseconds (us) duration = pulseIn (echo, HIGH);
//Speed of sound = 340m/s or 0.034cm/us //Distance will be in cm distance = duration * 0.034/2;
Serial.println("distance "); Serial.println(distance); delay(500); } if (val>600&&val<1200){ myservo.write (valop=valop +3); delay(10); } if (val<300&&val>1){ myservo.write (valop=valop -3); delay(10); } val1 = analogRead(potpin1); // reads the value of the potentiometer (value between 0 and 1023) //val = map(val, 0, 1023, 0, 1023); if (val1<600&&val1>400){ myservo1.write (valop1=valop1); delay(20); //Serial.print("val1_"); //Serial.println(val1); delay (10); } if (val1>600&&val1<1200){ myservo1.write (valop1=valop1 +3); delay(10); } if (val1<300&&val1>1){ myservo1.write (valop1=valop1 -3); delay(10); } //Serial.print("valop1_"); //Serial.println(valop1); val2 = analogRead(potpin2); // reads the value of the potentiometer (value between 0 and 1023) //val = map(val, 0, 1023, 0, 1023); if (val2<600&&val2>400){ myservo2.write (valop2=valop2); delay(20); //Serial.print("val2_"); // Serial.println(val2); } if (val2>600&&val2<1200){ myservo2.write (valop2=valop2 +3); delay(10); } if (val2<300&&val2>1){ myservo2.write (valop2=valop2 -3); delay(10); } //Serial.print("valop2_"); //Serial.println(valop2); val3 = analogRead(potpin3); // reads the value of the potentiometer (value between 0 and 1023) //val = map(val, 0, 1023, 0, 1023); if (val3<600&&val3>400){ myservo3.write (valop3=valop3); delay(20); Serial.print("val3_"); Serial.println(val3); } if (val3>600&&val3<1200){ myservo3.write (valop3=valop3 +3); delay(10); } if (val3<300&&val3>1){ myservo3.write (valop3=valop3 -3); delay(10); } Serial.print("valop3_"); Serial.println(valop3); long duration, distance; digitalWrite(trigPin, LOW); // Added this line delayMicroseconds(2); // Added this line digitalWrite(trigPin, HIGH); // delayMicroseconds(1000); - Removed this line delayMicroseconds(10); // Added this line digitalWrite(trigPin, LOW); duration = pulseIn(echoPin, HIGH); distance = (duration/2) / 29.1; if (distance < 4) { // This is where the LED On/Off happens digitalWrite(led,HIGH); // When the Red condition is met, the Green LED should turn off digitalWrite(led2,LOW); } else { digitalWrite(led,LOW); digitalWrite(led2,HIGH); } if (distance >= 200 || distance <= 0){ Serial.println("Out of range"); } else { Serial.print(distance); Serial.println(" cm"); } delay(500); }