Paso 3: Cableado y programación del receptor
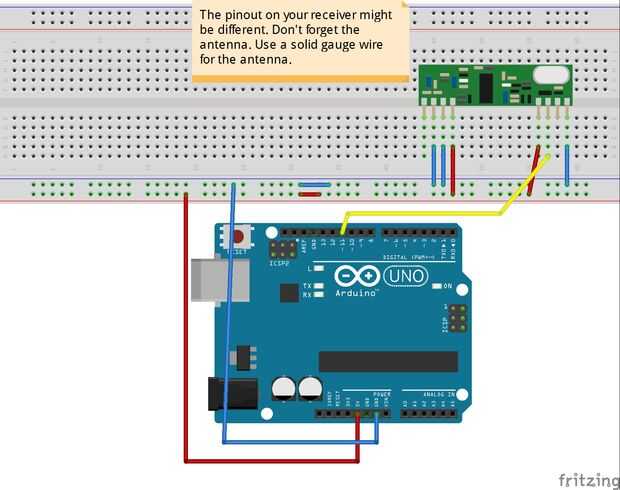
Utilice el diagrama para conectar el receptor.
Añadir el siguiente código en el Arduino.
#include <VirtualWire.h> // you must download and install the VirtualWire.h to your hardware/libraries folder int numbers[3]; // Change 3 to number of integers you wish to send. void setup() { Serial.begin(4800);// Initialise the IO and ISR vw_set_ptt_inverted(true); // Required for RX Link Module vw_setup(1000); // Bits per sec //vw_set_rx_pin(2); // We will be receiving on pin 23 (Mega) ie the RX pin from the module connects to this pin. vw_rx_start(); pinMode(11, OUTPUT);// Start the receiver</p><p> Serial.println("Receiver ready!"); } void loop(){ uint8_t buf[VW_MAX_MESSAGE_LEN]; uint8_t buflen = VW_MAX_MESSAGE_LEN;</p><p> if (vw_get_message(buf, &buflen)) // check to see if anything has been received { for (int i = 0; i < buflen; i++) { //Serial.print("buf["); //Serial.print(i, DEC); // Serial.print("]="); int val = (buf[i]); Serial.println(val); } } delay(50); } El receptor se hace!