Paso 3: Software - (Arduino)
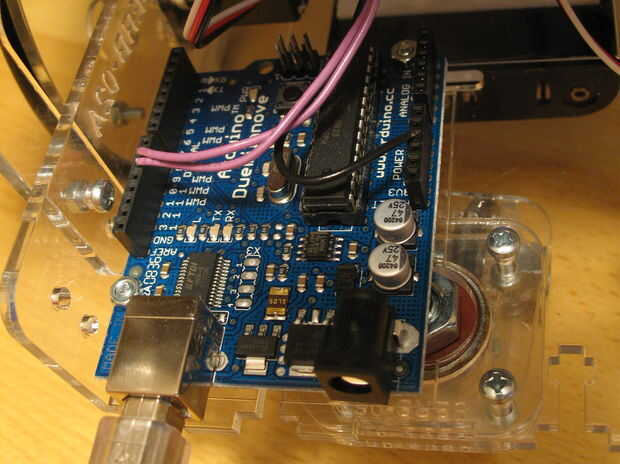
Primer software que se ejecuta en el Arduino. Es un programa muy sencillo, lo que hace el Arduino es controlar el puerto serie para datos.
Lo que busca es una conversación de 5 bytes de longitud.
- Byte 1-3 (bytes de verificación "AAA")
- Comando de bytes 4 (dice el arduino que hacer) (admite comandos 'F' -, 'B' - al revés, 'L' 'R', izquierda - derecha, del ' - velocidad, 'X' - SetSpeedLeft, 'Y' - SetSpeedRight, 'C' - parada)
- Parámetro del byte 5 - para el movimiento manda esto es interpretado como un intervalo de tiempo (parámetro * 100 ms), y para la velocidad manda un porcentaje de 0 a 100
El código es comentó fondo y dado este marco agregar comandos adicionales deben ser fácil.
Para descargar:
- Descargue el archivo zip adjunto. (Código.zip 05-WEBB-Arduino)
- Descomprimes en tu directorio de Arduino Sketch. (por defecto: mi Documents\Arduino\)
- Abra su entorno de desarrollo arduino y subir a tu Arduino.
Copiar y pegar
- Copie el código de abajo.
- Pegar en el entorno de desarrollo Arduino.
- Sube a tu Arduino.
Apéndice: El programa de Arduino
/* * Arduino Controlled Web Connected Robot (WEBB) - Serial Host * For more details visit: http://www.oomlout.com/serb * * Behaviour: The Arduino listens to its Serial port for a command * in format 254, 88, 88, (COMMAND), (TIME) * Supported Commands - 'F' - 70 - Forward * 'B' - 66 - Backward * 'L' - 76 - Left * 'R' - 82 - Right * 'S' - 83 - Speed * 'X' - 88 - SetSpeedLeft * 'Y' - 89 - SetSpeedRight * 'C' - 67 - Stop * Supported Times - 0 - 255 (0 to 25.5 Seconds) value * 100 milliseconds *sp * Wiring: Right Servo Signal - pin 9 * Left Servo Signal - pin 10 * * License: This work is licenced under the Creative Commons * Attribution-Share Alike 3.0 Unported License. To * view a copy of this licence, visit * http://creativecommons.org/licenses/by-sa/3.0/ * or send a letter to Creative Commons, 171 Second * Street, Suite 300, San Francisco, California 94105, * USA. * */ //-------------------------------------------------------------------------//START OF ARDUINO SERIAL SERVER PREAMBLE//Defining constants corresponding to each command (also the ascii code number) #define FORWARD 70 //F#define BACKWARD 66 //B#define LEFT 76 //L#define RIGHT 82 //R#define SETSPEED 83 //S#define STOP 67 //C#define SETSPEEDLEFT 88 //X#define SETSPEEDRIGHT 89 //Y/*The three check bytes (used to keep the robot from responding to random serial *data) currently "AAA" */#define checkByte1 65 // "A"#define checkByte2 65 // "A"#define checkByte3 65 // "A" //--------------------------------------------------------------------------// START OF ARDUINO CONTROLLED SERVO ROBOT (SERB) PREAMBLE#include <Servo.h>#define LEFTSERVOPIN 10 //The pin the left servo is connected to#define RIGHTSERVOPIN 9 //The pin the right servo is connected toServo leftServo; Servo rightServo; int leftSpeed = 50; //holds the speed of the robots leftServo //a percentage between 0 and 100int rightSpeed = 100; //holds the speed of the robots rightServo //a percentage between 0 and 100// END OF ARDUINO CONTROLLED SERVO ROBOT (SERB) PREAMBLE//--------------------------------------------------------------------------//Gets everything up and runningvoid setup() { Serial.begin(9600); //Starts the serial port serbSetup(); //sets the state of all neccesary //pins and adds servos to your sketch}//The main program loopvoid loop() { serbPollSerialPort(); //continuously looks to the serial port //if there is data it processes it}//-----------------------------------------------------------------------//START OF ARDUINO SERIAL SERVER ROUTINES/* * Processes commands delivered to the arduino's serial port */void serbPollSerialPort(){ int dta; //variable to hold the serial byte if ( Serial.available() >= 5) { //if 5 bytes are in the buffer (length pf a full request) dta = Serial.read(); if ( dta = checkByte1){ //Checks for first check byte dta = Serial.read(); if ( dta = checkByte2){ //Checks for second check byte dta = Serial.read(); if ( dta = checkByte3){ //Checks for third check byte int command = Serial.read(); //Fourth byte is the command int param1 = Serial.read(); //Fifth byte is param1 interpretCommand(command, param1); //sends the parsed request to it's handler } } } }}/* * Takes the command and parameter and passes it to the robot */void interpretCommand(int command, int param1){if (command == FORWARD){goForward(); delay(param1 * 100); goStop();} //if forward else if(command == BACKWARD){goBackward(); delay(param1 * 100); goStop();} //if backwards else if(command == LEFT){goLeft(); delay(param1 * 100); goStop();} //if left else if(command == RIGHT){goRight(); delay(param1 * 100); goStop();} //if right else if(command == SETSPEED){setSpeed(param1);} //if setting speed else if(command == STOP){goStop();} //if stop else if(command == SETSPEEDLEFT){setSpeedLeft(param1);} //if setting left speed else if(command == SETSPEEDRIGHT){setSpeedRight(param1);} //if setting right speed else{ //if unrecognized command do a little shimmey goLeft(); delay(150); goRight(); delay(150); goStop(); }}//------------------------------------------------------------------------//START OF ARDUINO CONTROLLED SERVO ROBOT (SERB) ROUTINES/* * sets up your arduino to address your SERB using the included routines*/void serbSetup(){ setSpeed(leftSpeed); pinMode(LEFTSERVOPIN, OUTPUT); //sets the left servo signal pin //to output pinMode(RIGHTSERVOPIN, OUTPUT); //sets the right servo signal pin //to output leftServo.attach(LEFTSERVOPIN); //attaches left servo rightServo.attach(RIGHTSERVOPIN); //attaches right servo goStop();}/* * sets the speed of the robot between 0-(stopped) and 100-(full speed) * NOTE: speed will not change the current speed you must change speed * then call one of the go methods before changes occur.*/ void setSpeed(int newSpeed){ setSpeedLeft(newSpeed); //sets left speed setSpeedRight(newSpeed); //sets right speed}/* * Sets the speed of the left wheel */void setSpeedLeft(int newSpeed){ if(newSpeed >= 100) {newSpeed = 100;} //if speed is greater than 100 //make it 100 if(newSpeed <= 0) {newSpeed = 0;} //if speed is less than 0 make //it 0 leftSpeed = newSpeed * 0.9; //between 0 and 90}/* * Sets the speed of the right wheel */void setSpeedRight(int newSpeed){ if(newSpeed >= 100) {newSpeed = 100;} //if speed is greater than 100 //make it 100 if(newSpeed <= 0) {newSpeed = 0;} //if speed is less than 0 make //it 0 rightSpeed = newSpeed * 0.9; //scales the speed to be }/* * sends the robot forwards */void goForward(){ leftServo.write(90 + leftSpeed); rightServo.write(90 - rightSpeed);} /* * sends the robot backwards */void goBackward(){ leftServo.write(90 - leftSpeed); rightServo.write(90 + rightSpeed);} /* * sends the robot right */void goRight(){ leftServo.write(90 + leftSpeed); rightServo.write(90 + rightSpeed);}/* * sends the robot left */void goLeft(){ leftServo.write(90 - leftSpeed); rightServo.write(90 - rightSpeed);}/* * stops the robot */void goStop(){ leftServo.write(90); rightServo.write(90);}//END OF ARDUINO CONTROLLED SERVO ROBOT (SERB) ROUTINES//---------------------------------------------------------------------------


